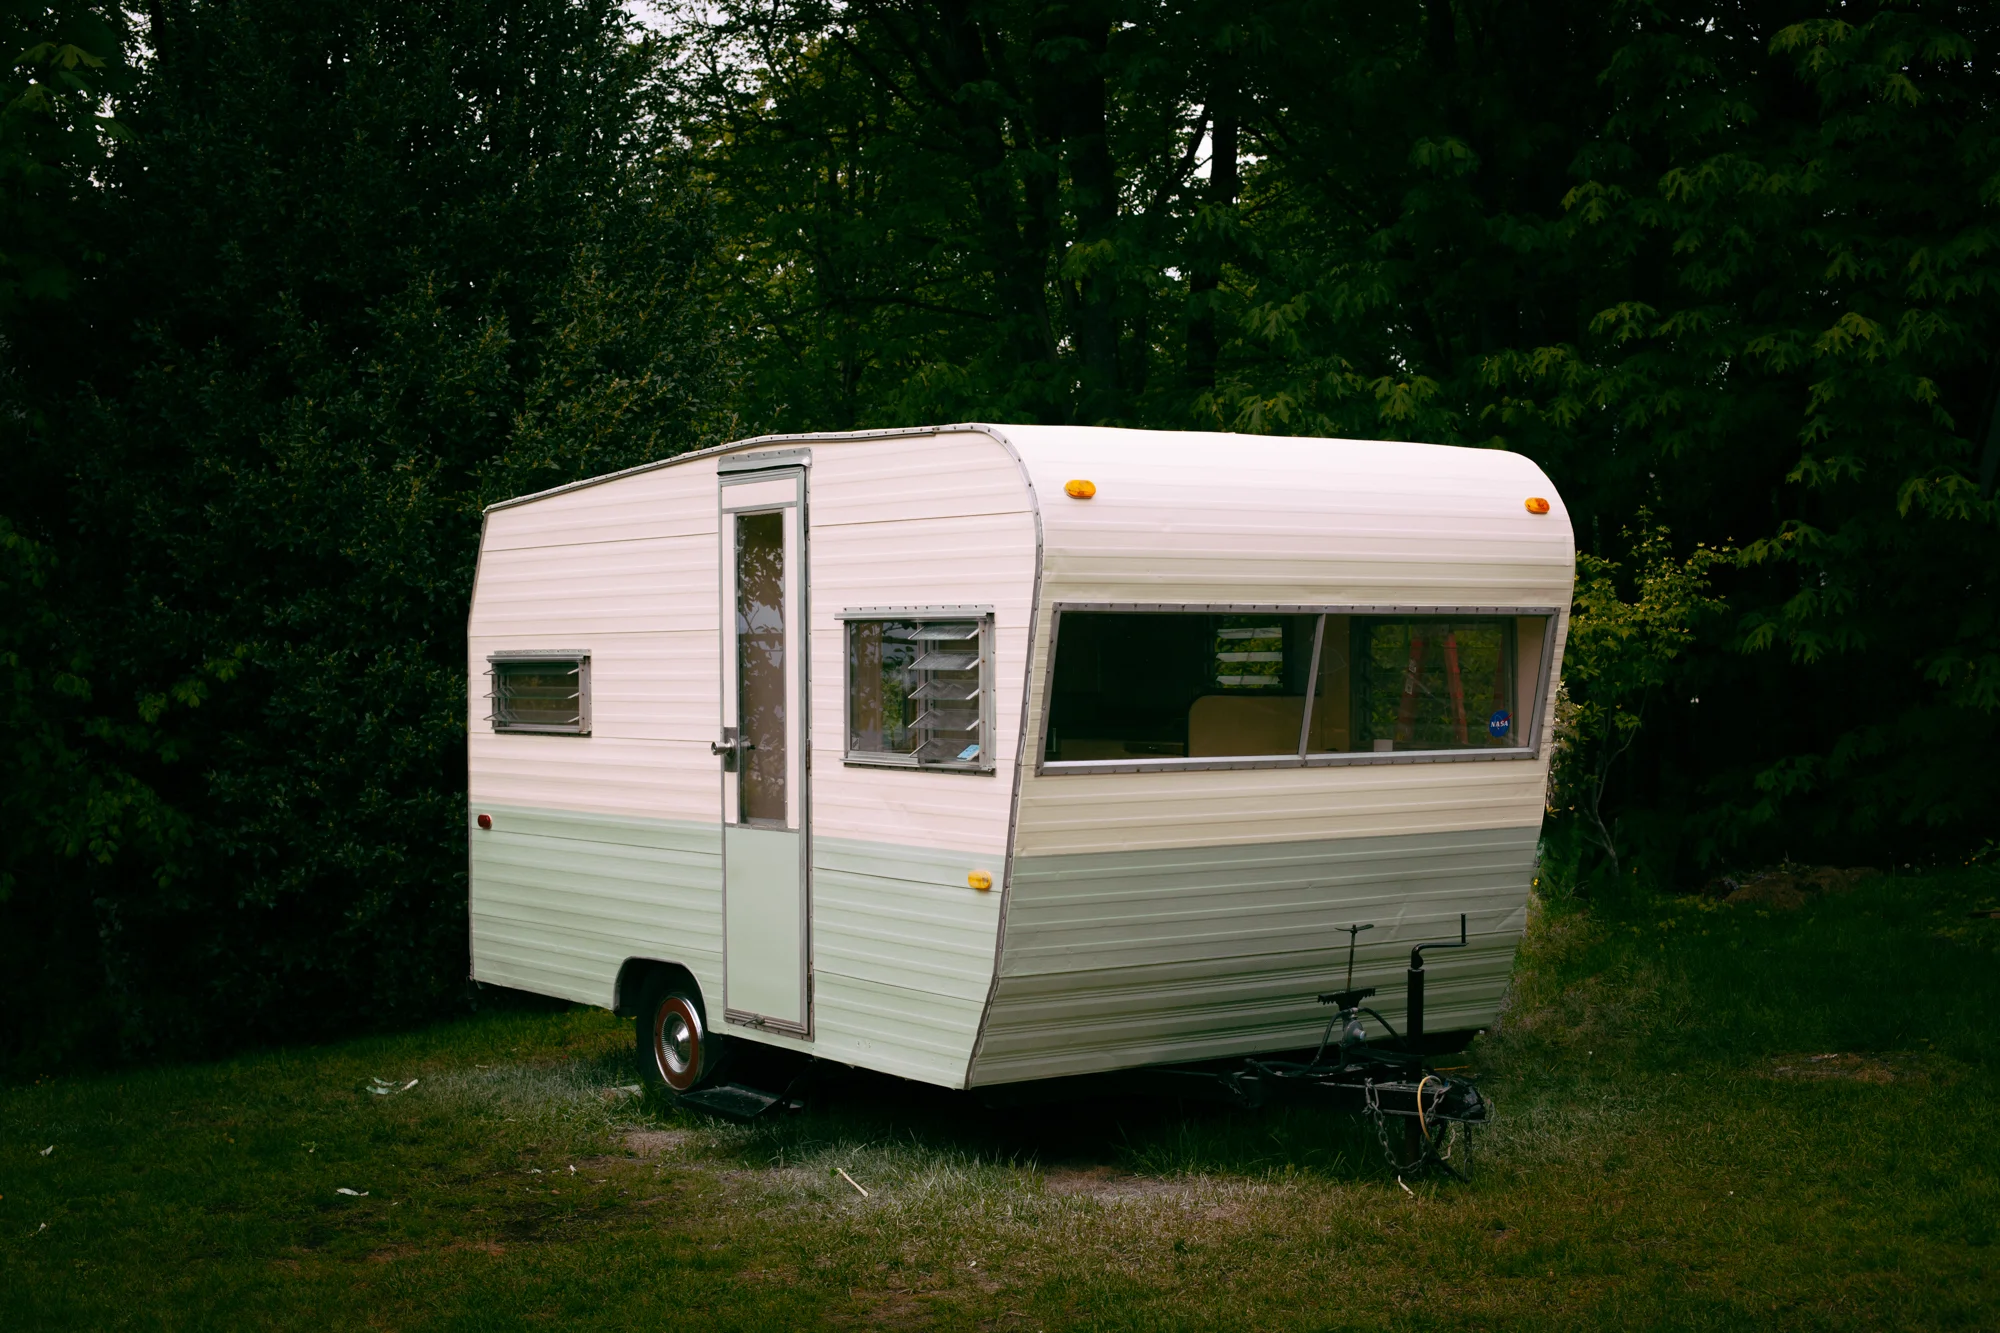
We had so much fun painting Bobby Jean but the finished product wasn’t quite perfect. We knew this time around we would learn from our mistakes, take our time and not be drunk.
Last time:
Below is a step-by- step guide to how we painted Billy. We are not in the restoration business and had a not-so-standard finish in mind so this is likely not how you would paint a show trailer. We had a very solid idea of that we wanted to have and these are steps we took.
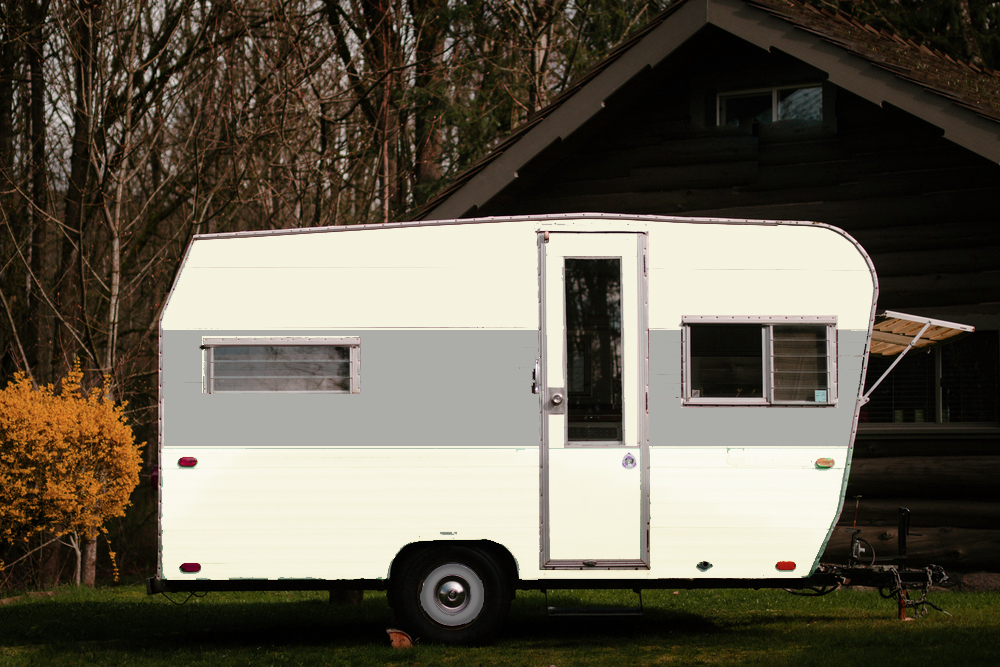
1) Choose your design. We briefly debated doing some more complicated design details but we really wanted to keep Billy clean and uncomplicated so we settled on a simple two tone paint job. Mocking up a few options in Photoshop helped us get an idea of what we wanted. We were originally looking for a buttercup yellow and cream, but once we started playing with it in Photoshop it seemed a little too cutesey for us. After rolling through the entire spectrum, we ended up really loving a mint/sage green with a creamy white. Doing the mockups also helped us realize that our original idea of a horizontal stripe made the trailer seem really long and narrow. The stripe also called a lot of unwanted attention to the fact that none of the windows (or anything on or in the trailer) are the same size or height. Eventually we decided that painting the bottom third with our accent color was the easiest and best option.
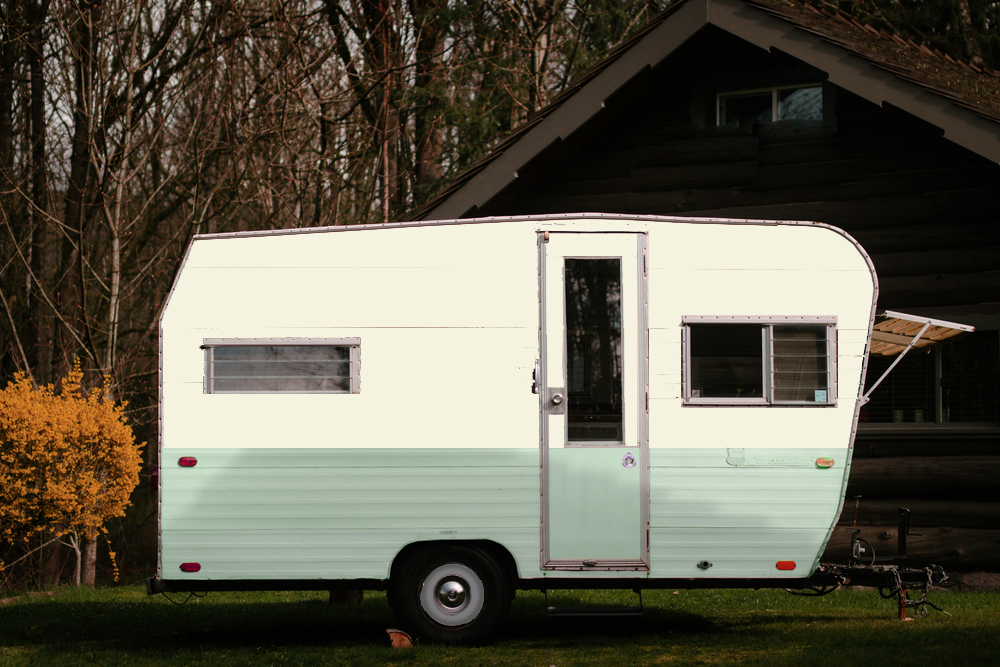
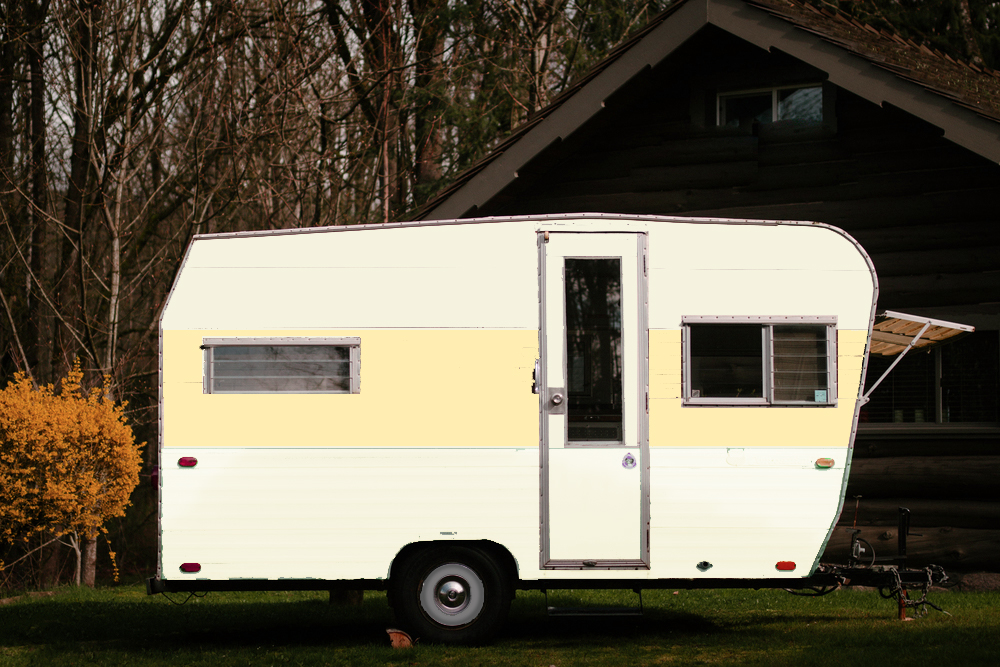
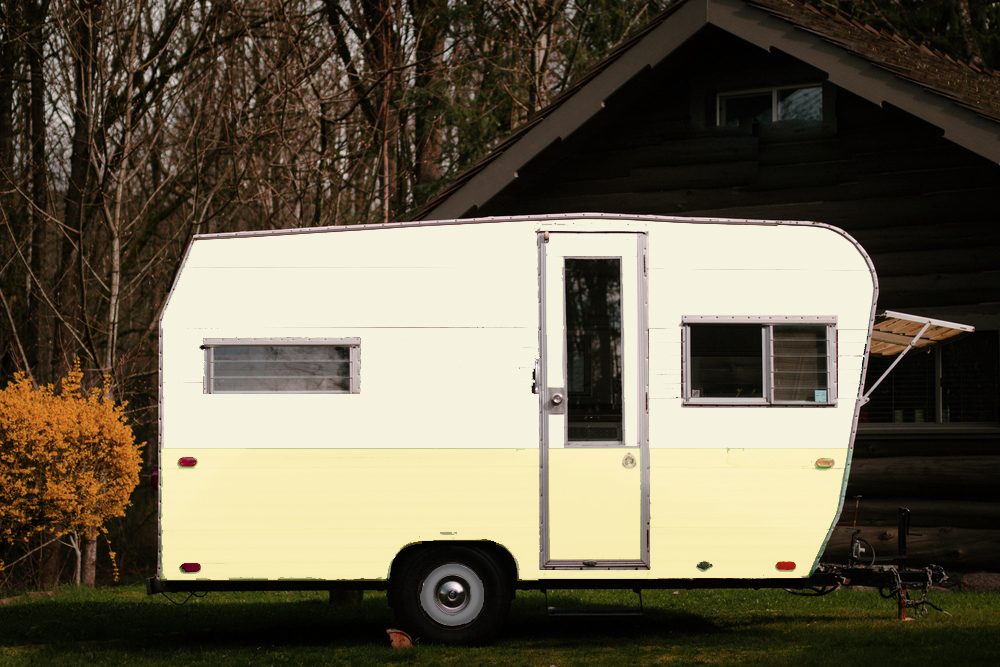
2) Choose your paint wisely. We wanted a satin finish on the trailer instead of gloss (not standard for a vehicle but perfect for us) so we chose heavy-duty exterior house paint and opted not to clear coat. We didn’t want a shiny hot rod finish so this was great for us and gave us an amazing range of colors to choose from. We needed something really durable since the trailer takes a lot of wear so we went for the sturdiest paint we could find. Our colors were Almond Milk and Apple Grove by Behr; a nice warm white and minty sage green. We looked through probably 100 colors before deciding and we’re so glad that we did because this pairing is perfect for us.
We took the samples out of the store to make sure we knew what they looked like in sunlight, you’d be surprised by how much this affects the tones. Keep in mind your trailer will be outside, always.
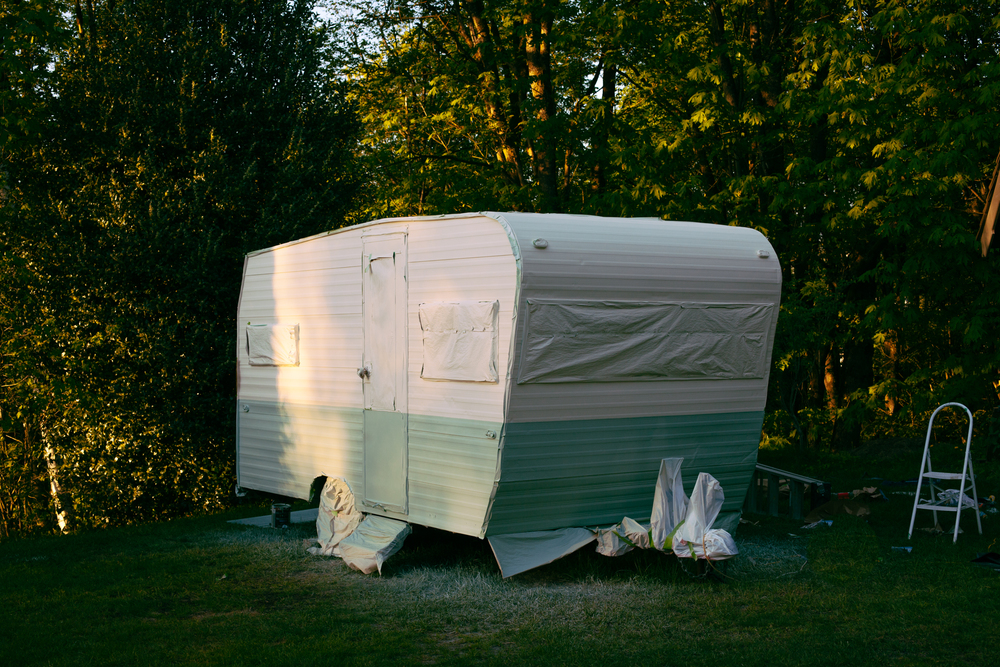
3) WASH the thing. We wanted to pressure wash the trailer but we didn’t want to end up forcing water between the seams so we did this step by hand. We used TSP, S.O.S pads, water and a whole lot of elbow grease. Start at the top and work your way down. There was so much old dirt on it that when it was finally cleaned it looked so nice we briefly contemplated leaving it just so.

4) Remove all the lights, badges, reflectors etc. Taping this stuff off is a nightmare; you’re better off just removing it. You'll have to circle back and handwash around these spots, but if you remove them before the big wash you risk getting water in the holes and damaging your trailer.
5) Fill dents and holes with bondo. Mix this stuff in the smallest batches because it dries up in like 10 seconds and becomes a giant pain in the ass.
6) Sand everything. I mean everything. Sand down the bondo, sand down and scuff the entire surface so the paint has a better surface to adhere to.
7) Wash and rinse again. You’re going to get rid of all the dusk and gunk you created by sanding, if you did it right there will be a whole lot to wash off.
8) Now it’s time to tape everything off, we used a sprayer to paint, we knew that stuff would be flying everywhere so we taped absolutely everything off and used paper over the windows. We also taped and sealed the exposed areas where the vents and lights were. Buy more tape than you think you’ll need and then buy even twice as much as that, it sucks to have to make a run to the store half way through and its not something to skimp out on or leave half done.

9) Prime. This step is hugely important, especially since we were painting over the brown stripe and all sorts of patches and scratches. We used a spray can of Rustoleum primer and hit anywhere where the texture was uneven, and the entire brown stripe.
10) Paint your first color! We used a sprayer for this and we were so glad we did, we got a really nice even finish and it really cut our time down. Get yourself a stepladder and start from the top, working your way down. Try to pick a mild day for painting, with as little (ideally no) wind. This stuff will go everywhere if the breeze kicks up and will dry practically midair if it’s really hot out. We started with the off white and even though we knew approximately where we wanted to start the green we allowed ourselves to overspray so we made sure we got full coverage on the bottom half and some wiggle room to start the green lower if we changed our minds. We did about three coats and allowed a bit of drying time in between each, stamping down any lumps or spatter that came out with a foam brush or a light sand to even out the surface. Pro tip- about 150 bugs died in our paint (RIP) Don’t try and get them out while it’s wet, just sand em off once they dry or else you’ll get big ole fingerprints in your beautiful, even paint.

11) Tape off the line for your second color. In hindsight we would have ideally started at the bottom since if would have been easier to tape off the bottom half versus having to tape off the entire top of the trailer out of fear of spraying any green onto the new white. When taping off the line make sure you take proper measurements. The lines in the metal skinning on either side of the trailer did not match up so we couldn’t follow them to create an even stripe. Take your time with this and make sure that tape is really on there; we splurged on heavy-duty frog tape for the stripe. Tape the stripe first and then tape the paper sheeting on top of that with separate tape, you don’t want any weight on that first tape stripe in case it causes it to lift or shift. Then spray on your second color the same way as the first!

12) Remove the tape! Don’t wait too long to do this or else your paint could lift off unevenly with the tape once you start pulling it off. Keep a razor blade on hand if this starts to happen and cut the line at the edge of the tape and pull off slowly.
13) Put all the badges and lights back on, we resealed the edges with caulking on some that didn’t feel as secure as we wanted.
And you're done!
This is definitely not a professional tutorial or the standard finish for a vintage trailer but we are so happy with the results. We really wanted something that wasn’t super reflective but more muted and matte and it ended up exactly how we imagined! This paint is also tough as nails so we are pretty hopeful it’s on there for good. We are still debating adding a pinstripe along the break and also maybe adding some signage or custom paint detailing to give it more personality but we aren’t there just yet.